User Guide of Imivo Image Generator
Want to turn your ideas into stunning visuals? Or enhance your photos? These tools make it easy to create and improve images in just a few steps. With AI to Generate Images from Text, you can turn simple words into eye-catching visuals. Meanwhile, Basic Photo Effects help beautify your images with quick and easy edits. In addition, AI Photo Filters let you transform photos into creative styles, helping you save time while achieving professional-looking results. To know more, read this user guide further and learn how to use them easily!Getting Started
Step 1Create an Account
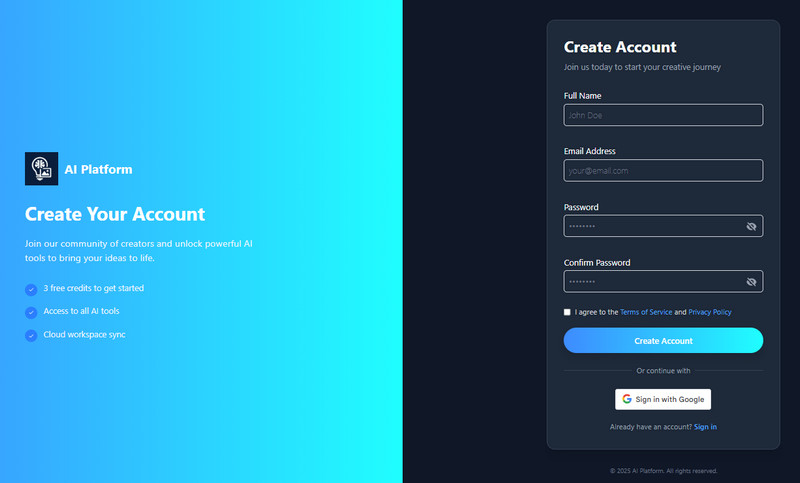
Start by visiting the AI tool in your web browser. On the tool's homepage, you will need to create an account. You can click the "Sign-in with Google" button if you want to use your Google Account for less hassle registration. Alternatively, you can use the "Sign Up" button, then enter your information, such as your full name, email address, and password. After that, tick the box beside the Terms of Service and Privacy policy and hit the "Create Account" button.
Step 2Buy Credits (Optional)
After creating an account, you will receive 10 free credits that you can use to generate and enhance images. But if you want more, click the "Credits" button beside your Profile and select "Buy Credits" From the next screen, choose the plan you prefer. We offer One-Time Credits priced from $1.99 to $39.99 and Subscription Plans priced from $2.50 to $30.00.
Credit Pricing for Our AI Tools:
- Text to Image: 3 Credits
- Text to Video: 25 Credits
- Background Remover: 3 Credits
- Object Eraser: 1 Credit
- Image Upscaler: 3 Credits
- Photo Effects: 1 Credit
- Video Effects: 2 Credits
- Photo Filters: 3 Credits

How to Use AI to Generate Images from Text
Our AI Text-to-Image generator turns simple words into clear, high-quality images in just a few seconds. You can generate any image you want by simply typing a short prompt, and the tool will turn it into real visuals. Additionally, it provides a range of AI models for each style and purpose, giving you greater control over the final result. As a result, you can create realistic photos, artistic illustrations, or creative designs that fit your needs. Moreover, the tool is useful for social media posts, blog images, marketing materials, and personal projects. Because everything is automated, you can save time and effort while still getting high-quality visuals. Overall, it helps you turn ideas into images easily, quickly, and with confidence.
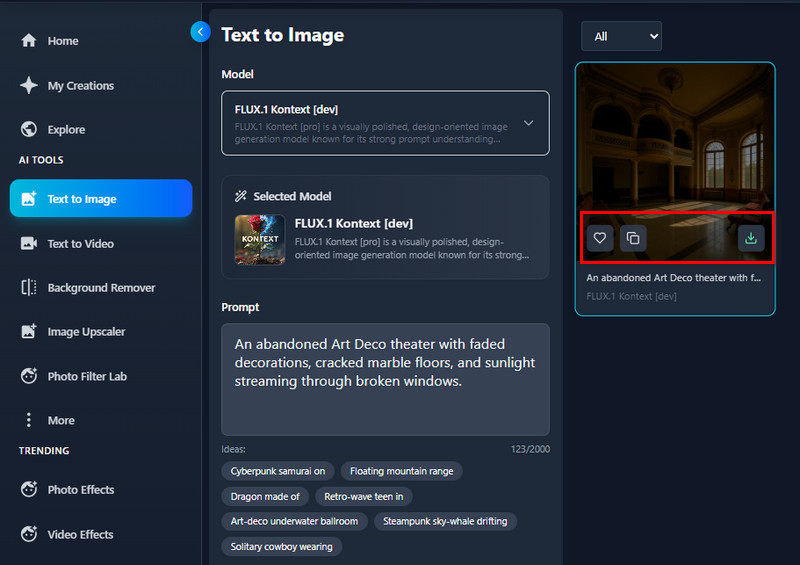
Step 1Enter Your Prompt
Under the AI Tools section, go to the "Text to Image" tool. Then, start describing the image you want to generate in the Prompt box.

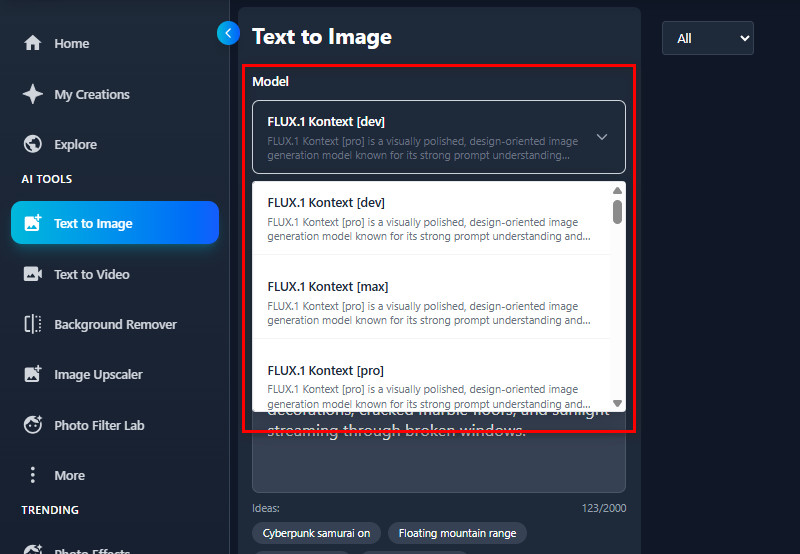
Step 2Choose an AI Model
Next, choose the AI model you prefer from the available options. You can choose from FLUX.1 Kontext, HiDream-I1-Dev, Juggernaut Lightning Flux by RunDiffusion, Pixelwave Flux 0.4, Pixelwave Schnell 0.4, RealVisXL V5.0, Stable Diffusion 3, and many more.
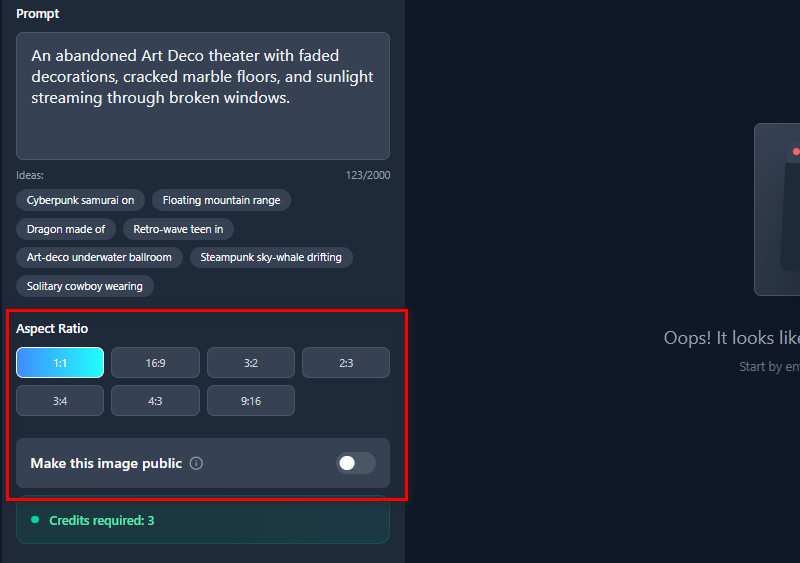
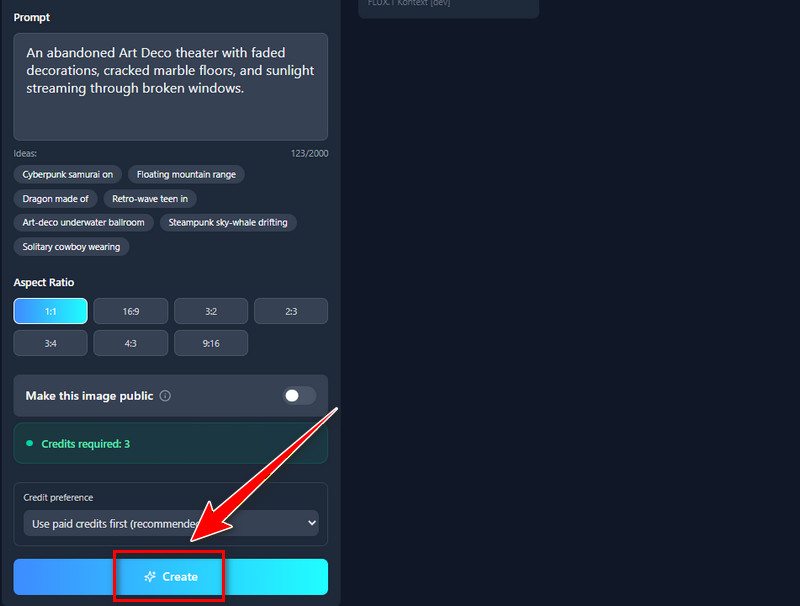
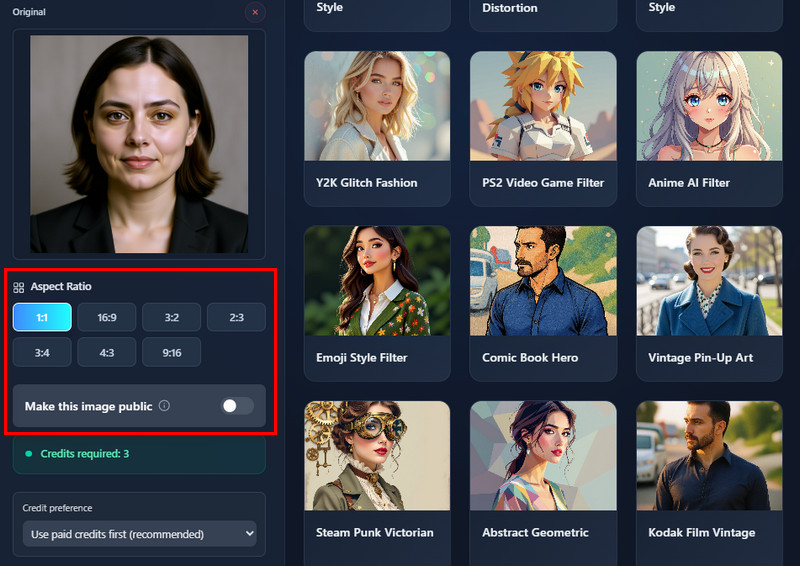
Step 3Choose an Aspect Ratio
After that, navigate to the Aspect Ratio section to choose the output image size. We offer sizes including 1:1, 16:9, 3:2, 2:3, 3:4, 4:3, and 9:16. You can also make the generated images public or private, if you want.
Step 4Generate the Image
Once all set up, click the "Create" button, and the tool will start generating your prompt. The process will require 3 credits, and it only takes a few seconds.
Step 5Download and Share
When the result comes in, you can preview it on the right side. Then, you can add it to the Favorites tab by clicking the heart icon. You can also share it using the provided link; just click the copy icon. To download the generated image, simply click the Download icon. The image will be saved to your device as a JPG file.
How to Use Basic Photo Effects to Beautify Your Images
Our AI Basic Photo Effects help you beautify your images quickly and easily. We offer various effects that you can apply to your photos. You can apply creative effects like Sketch, Cartoon, Anime, and Artistic to change the overall look of your photos. Additionally, the tool provides Festivals, Face, Fantasy, Background, and Decorative effects to add mood, style, and fun details. With these effects, you can create more eye-catching and expressive images in just a few clicks. Plus, these images can be uploaded and used in social media posts, profile photos, and creative projects without issues. Overall, the tool saves you time while helping your photos look stylish, unique, and professional.
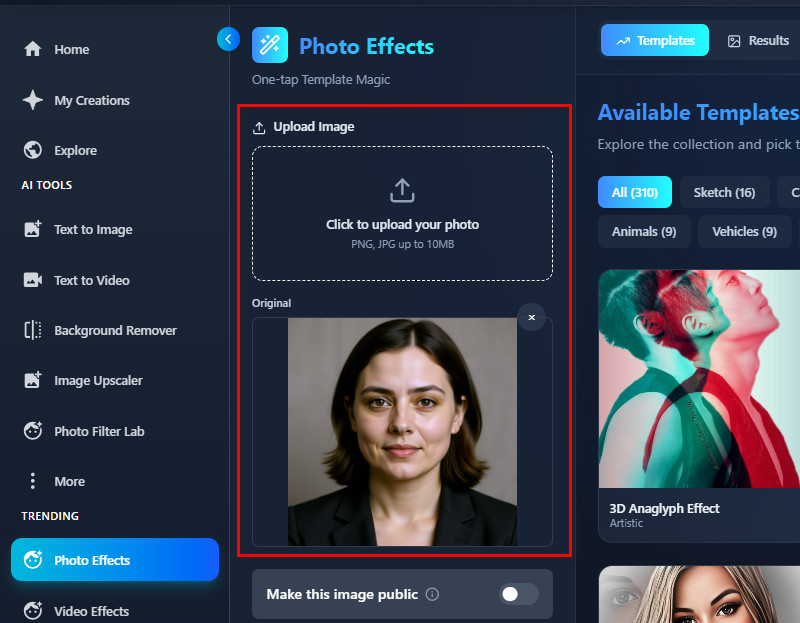
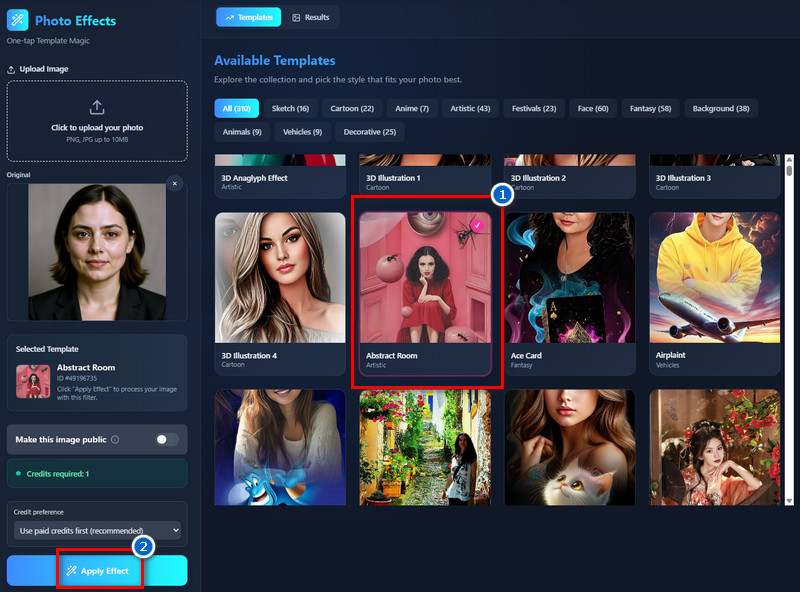
Step 1Upload Your Photo
On the Photo Effects tab, click the Upload button and select the photo you want to upload in the pop-up File Explorer. Alternatively, you can drag the image directly to the upload section and drop it there.
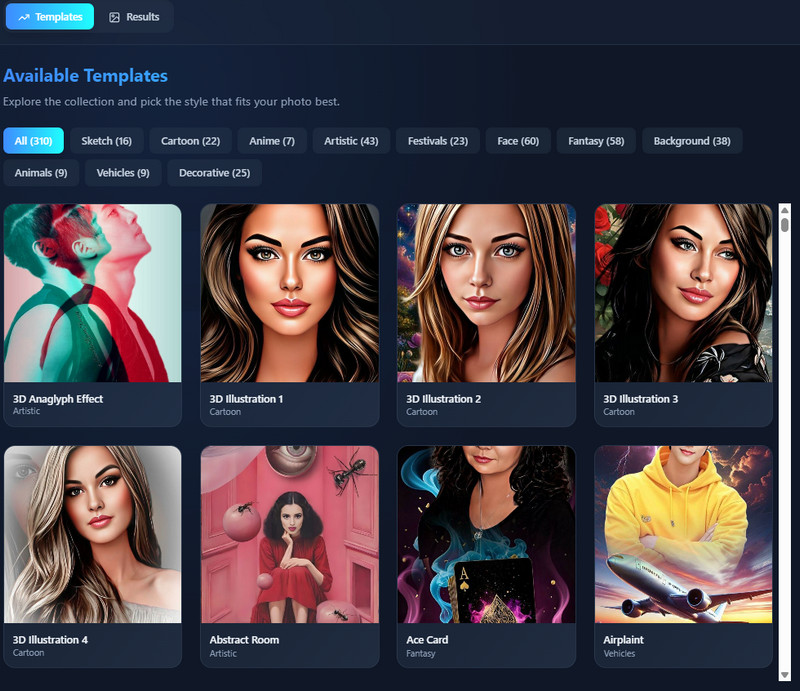
Step 2Choose an Effect
Next, choose the effect you prefer on the right side after uploading the photo. You can visit each effect section to find the one. Once you have found the photo effect, click it to select it.
Step 3Apply the Chosen Effect
To apply the desired effect, just click the 'Apply Effect" button. Then, the tool will process your image.
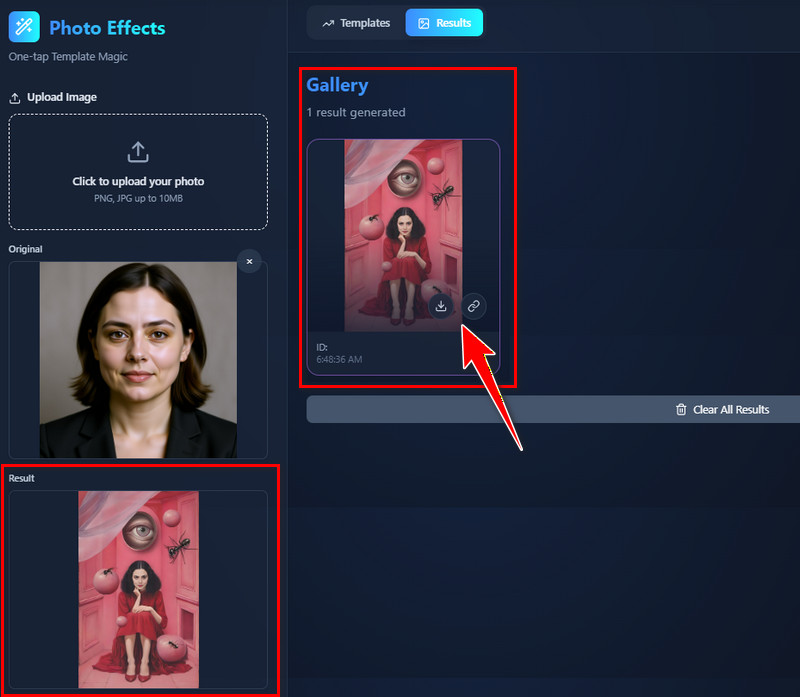
Step 4Preview and Download
After the process, preview your image below the original image or in the Gallery section. Finally, click the Download icon to get the output image, or click the hyperlink button to get its image link for easy sharing.
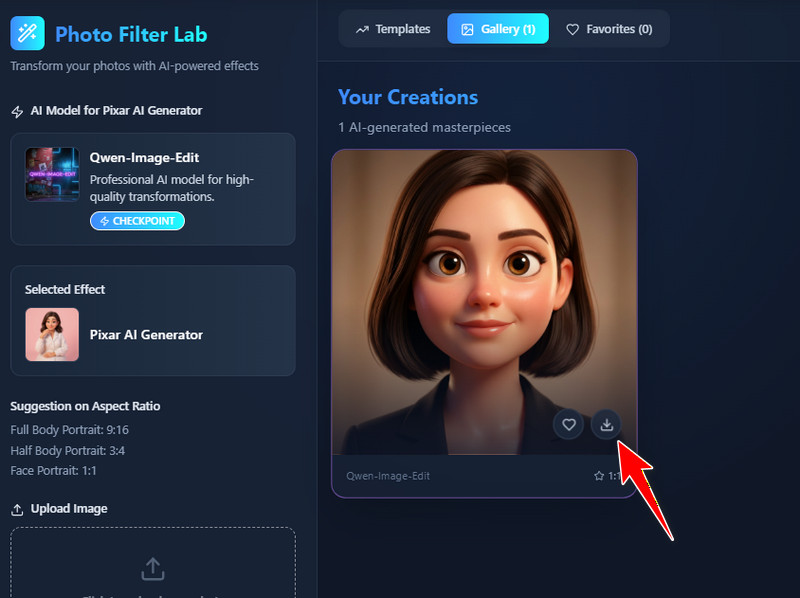
Part 3. How to Use AI Photo Filters to Transform Photos
This tool helps you transform ordinary photos into stunning visuals with no hassle. You can apply various filters to instantly change colors, tones, and moods. This includes Studio Ghibli Anime Style, Pixar AI Generator, AI Kid Filter, Psychedelic Trippy Art, Dark Gothic Fantasy, and many more. Besides, the tool allows you to enhance portraits, landscapes, or creative shots to make them more attractive. As a result, your images stand out on social media, blogs, and marketing materials without any copyright issues. Furthermore, the tool is perfect for users who want quick edits without complicated software. Overall, it saves time while giving your photos a fresh, creative, and polished look.
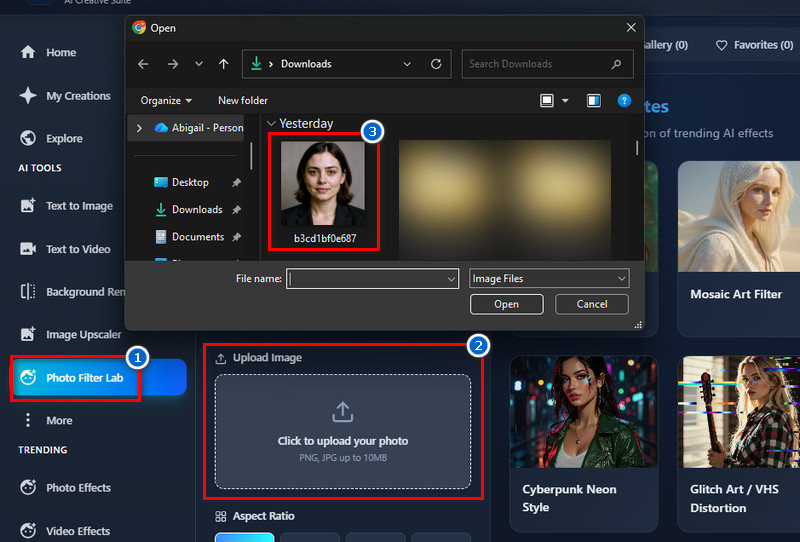
Step 1Upload Your Photo
On the Photo Filter Lab tab, go to the Upload Image section and click the upload icon. Then select the photo in File Explorer that appears on your screen. Alternatively, you can utilize the drag-and-drop method to upload a photo.
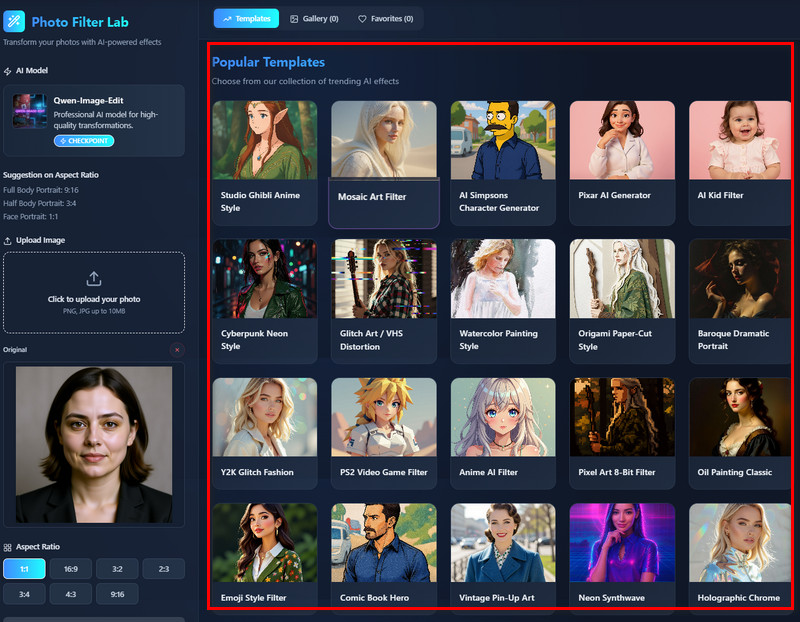
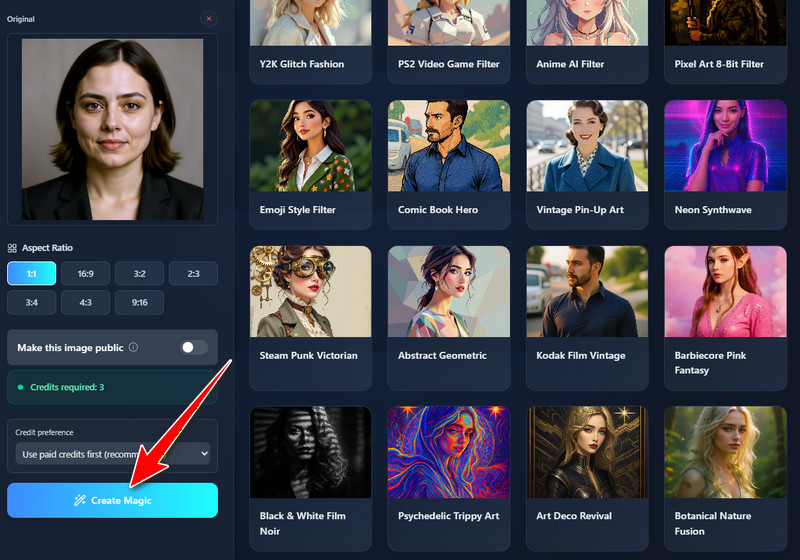
Step 2Choose a Photo Filter
Next, choose a photo filter you desire from our collection of trending AI effects. You can select Pixar, kid, watercolor painting, comic book, cyberpunk, trippy, and many more. Once you find your preferred filter, click it to select it.
Step 3Select an Output Image Size
Before generating the image, you need to select the output image size. We suggest using 9:16 for full-body portraits, 3:4 for half-body portraits, and 1:1 for face portraits.
Step 4Apply the Filter
When you're ready, click the "Create Magic" button, and the AI tool will start creating a new image. It will only take a minute, but it still depends on your internet connection.
Step 5Preview and Download
After the process, the tool will provide the results. You can preview it below the original photo and from the Gallery section. Once satisfied, save the final image using the Download icon.