User Guide of Imivo Video Generator
Want to bring your ideas to life in motion? Our tool offers a Text-to-Video Generator that instantly turns your words into dynamic video clips. In addition, you can use Image-to-Video Effects to transform your photos into engaging animated visuals. With these features, you can easily create social media content, presentations, or creative projects that stand out. Moreover, the tool saves you time while giving your videos a polished and professional look. If you want to know more about these features, keep reading this guide.Getting Started
Step 1Sign Up for an Account
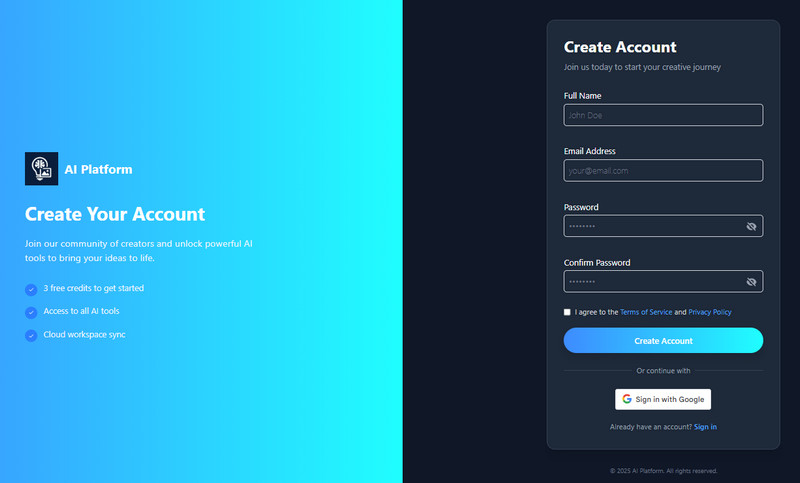
To get started, open the AI tool in your web browser. On the homepage, create a new account by either clicking "Sign in with Google" for a faster registration using your Google account or selecting "Sign Up" and entering your details like full name, email, and password. Next, agree to the Terms of Service and Privacy Policy by ticking the box, then click "Create Account" to finish the process.
Step 2Buy More Credits (Optional)
Once your account is set up, you'll get 10 free credits to start creating and enhancing images right away. If you want additional credits, click the "Credits" button near your profile and select "Buy Credits." Then, choose the plan that fits your needs. We provide One-Time Credit options from $1.99 to $39.99, as well as Subscription Plans ranging from $2.50 to $30.00.
Credit Pricing for Our AI Tools:
- Text to Image: 3 Credits
- Text to Video: 25 Credits
- Background Remover: 3 Credits
- Object Eraser: 1 Credit
- Image Upscaler: 3 Credits
- Photo Effects: 1 Credit
- Video Effects: 2 Credits
- Photo Filters: 3 Credits

Part 1. How to Create AI Videos from Images
This tool lets you turn any photo into a dynamic video quickly and easily. It offers various video effects such as dance, walking, close-up video, and more. In addition, the AI tool will detect only the face from the uploaded photo and add it to the chosen video filter. As a result, the output looks like a true, realistic video with your face seamlessly integrated. This makes it perfect for creating fun social media clips, personalized greetings, or creative projects. Overall, it transforms static images into dynamic, lifelike videos effortlessly.
Step 1Add Your Photo
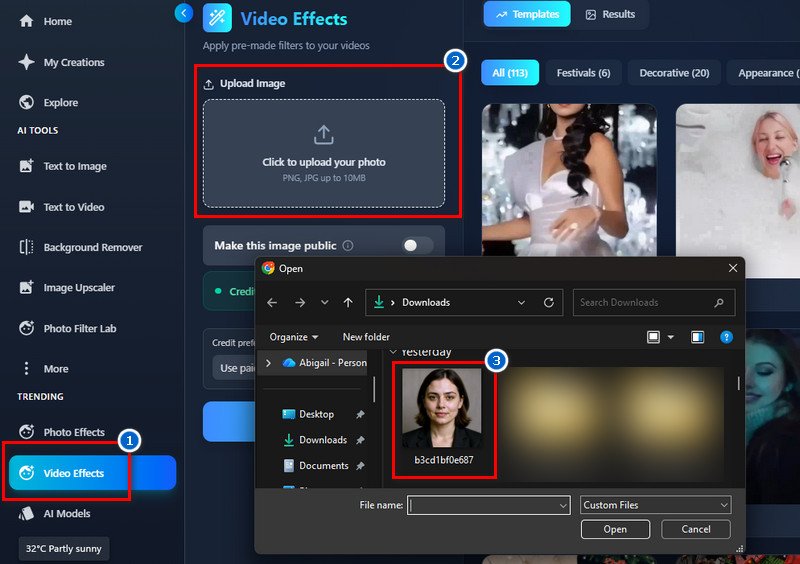
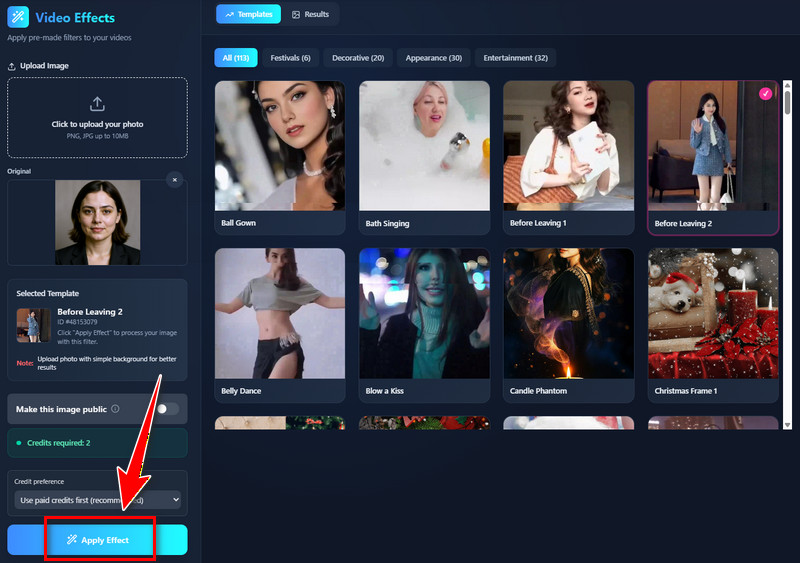
Begin by going to the Video Effects tab. Then, click the icon under the " Upload Image section and select your photo from the pop-up box. Or drag and drop the photo into the designated upload area.
Step 2Choose a Video Effect
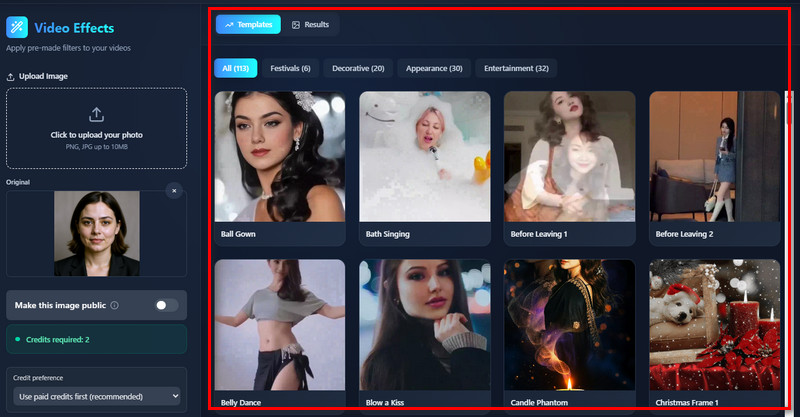
After uploading, go to the Templates section and choose the video effects you want. You can visit each tab, such as Festivals, Decorative, Appearance, and Entertainment, for easy finding.
Step 3Apply the Video Effect
To apply the video effect, simply click the "Apply Effect" button. The tool will then get the face feature of the photo and apply it to the effect. Wait a few minutes for the result.
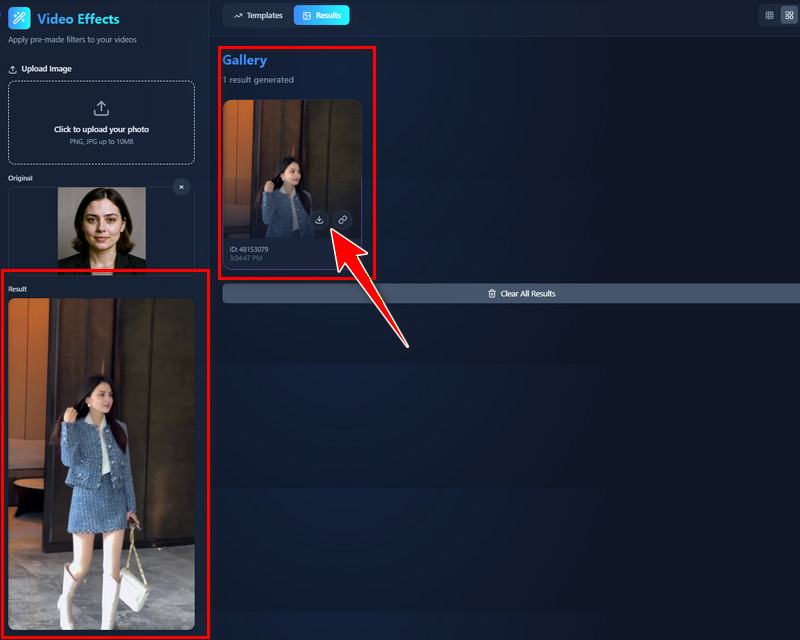
Step 4Save the Output Video
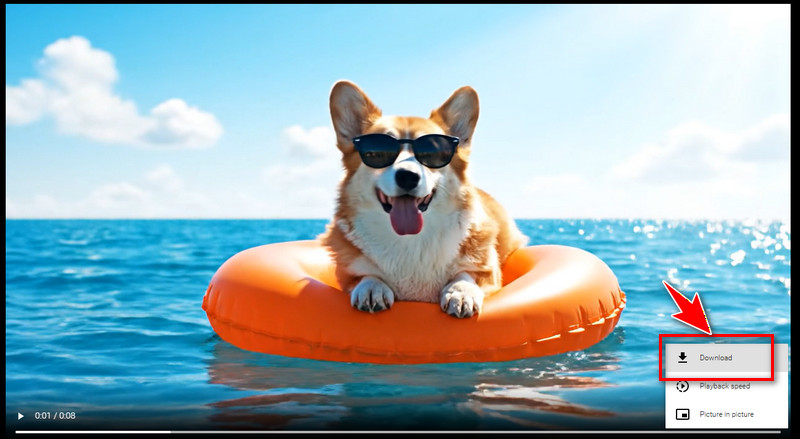
Once you see the result, you can preview it instantly on the Gallery tab. When satisfied, click the Download icon, and it will open a new browser tab. From there, click the three-dot icon, then select Download to download the output file.
Part 2. How to Create Videos from Your Text Prompts
Our AI Text-to-Video Generator lets you turn simple words into engaging videos quickly and easily. With a simple or detailed text prompt, the tool will automatically create a video that matches your description. In addition, you can customize styles, scenes, and effects to make the video more creative and eye-catching. It is perfect for creating quick videos for social media, marketing, presentations, or storytelling projects. Overall, it helps you transform ideas into professional-looking videos without needing advanced skills or software.
Step 1Input Video Description
Go to the prompt box and enter the description of the video you want to create. You can include details like subject, action, scene/location, camera movement, and lighting & style.
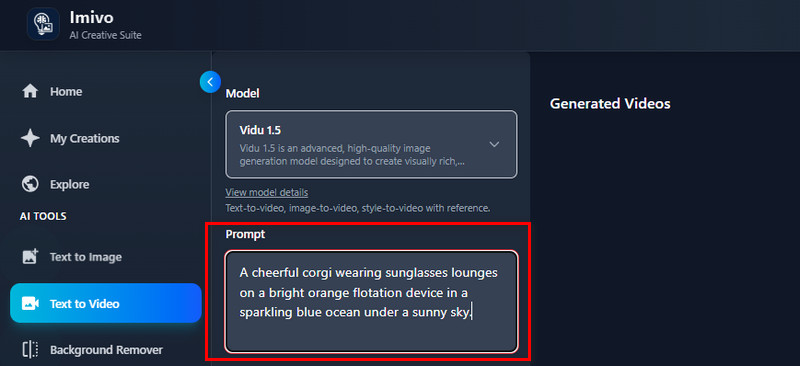
Step 2Choose an AI Model
Next, choose the AI model that you want. The tool offers Vidu 1.5, KlingAI V1 Pro, KlingAI V1.5 Pro, KlingAI V1.6 Standard, Veo 3.0 Fast, and Veo 3.0.

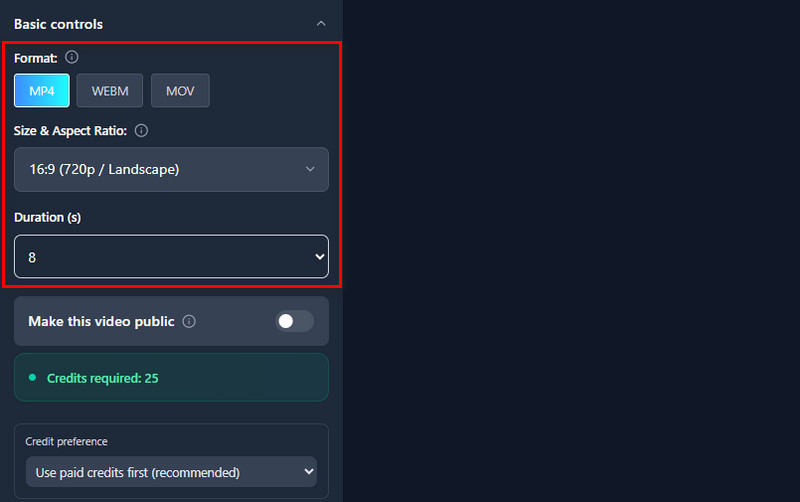
Step 3Customize the Video Settings
After that, go to the Basic Controls section to select video format, size & aspect ratio, and duration. You can choose MP4, WEBM, or MOV as the video output format. For size & aspect ratio, choose from 16:9 (1080p/landscape), 1:1 (540p/square), 9:16 (720p/portrait), and more. For Duration, select from 4 seconds and 8 seconds.
Step 4Generate the Video
Once all is set, click the "Generate" button and the tool will start creating your text prompt. Note that the generation process will take some time.

Step 5Preview and Download Generated Video
When you see the result, click the Download icon to open a new tab. Here, you can preview the generated video to see if the result matches your prompt. Once satisfied, download the video by clicking the three-dot icon and selecting Download.