 Screen recording is a straightforward way to capture what is happening on your screen. Many people use it to create tutorials, record presentations, save online meetings, or capture gameplay. It helps you explain things clearly since others can see exactly what you are doing. Because of this, more users want to learn how to screen record on Dell laptop without using complicated tools. At the same time, knowing different ways to record your screen can be very helpful. Some methods are quick and built into your device, while others offer more features, such as editing and better quality. Choosing the right option depends on what you need. In this guide, we will show how to record with the built-in tools and also explore some third-party tools to give you more control.
Understanding How to Record Screen on Dell Laptop
Most Dell laptops run Windows 10 or Windows 11, which already include basic tools for recording your screen. These built-in options are simple and easy to access, making them a good choice for quick recordings. However, they may have fewer features than other tools. On the other hand, third-party software offers more control and flexibility. You can record in higher quality, add audio, include a webcam, and even edit your videos after recording. Because of this, many users prefer these tools when they need more advanced results.
When you record screen on Dell laptop, the saved files are usually in common formats like MP4, AVI, or WMV. These formats are widely supported and easy to share or upload. Besides, people often use screen recording for tutorials, gameplay, video demos, and online classes, making it a useful feature for both work and personal use.

Record Desktop on Dell Laptop using Built-in Windows Tools
There are two primary built-in tools for screen recording on Dell laptops running Windows: the Xbox Game Bar and the Snipping Tool. You can leverage these integrated features to capture screen activity without installing additional software.
Xbox Game Bar
If you are utilizing Windows 10 or 11, the Xbox Game Bar offers a reliable way to capture your screen. Although it was designed for gaming, it also works well for recording other apps. It lets you choose a specific window to record, so you can focus on the content you need. Moreover, it allows you to capture the system sound and the microphone of your Dell laptop. Here are the steps to access and use the built-in screen recording tool on your Dell laptop.
Step 1 Access the Xbox Game Bar
Press the Windows key + G at the same time to open the Game Bar. This will bring up the recording interface on your screen. Make sure the app or window you want to record is active before starting.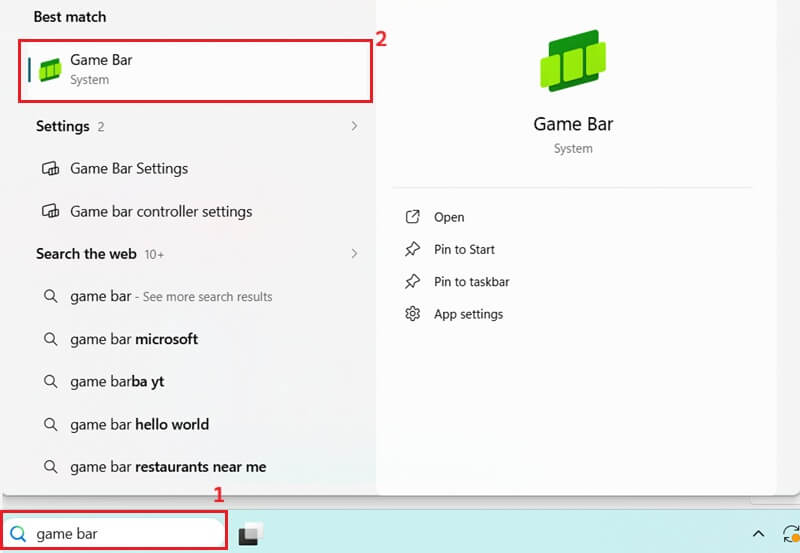
Step 2 Initiate the Recording
Click the Record button (a circle icon) within the Game Bar overlay to begin capturing your screen activity. Or you can utilize the shortcut keys Windows key + Alt + R to start recording your Dell laptop.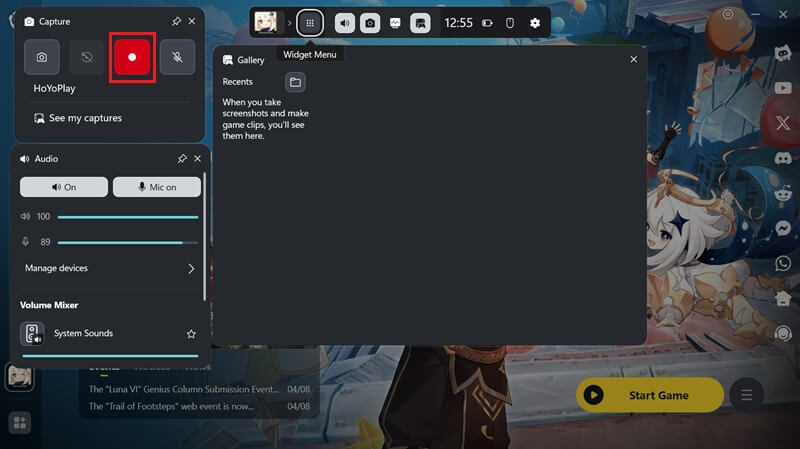
Step 3 Stop and Review Recording
Once your recording is complete, click the Stop button. After that, the video will automatically save to your computer’s "Videos" folder. You can also preview it on the Game bar panel; just click the "Play" button to start the playback.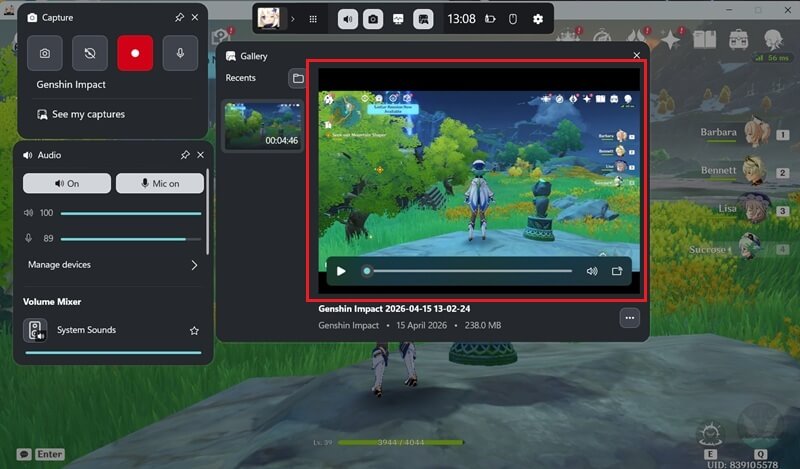
Snipping Tool
Another integrated Windows utility that offers screen capture functionalities is the Snipping Tool. While primarily designed for static screen captures, recent Windows 11 updates have enhanced its capabilities to include video recording. This makes it a versatile option for Dell users who want to capture both static and dynamic screens with a single application. To record screen on Dell laptop using the Windows 11 built-in tool, follow these detailed steps.
Step 1 Launch the Snipping Tool
To start accessing the application or window you intend to record on your Dell laptop. You can access the Snipping Tool by typing “Snipping Tool” in the Windows search bar and selecting the application. You can also utilize the keyboard shortcut Windows key + Shift + S to quickly launch the tool.
Step 2 Record Your Screen
After that, click on the “Record” button, typically represented by a camcorder icon. Then, click the "New" option on the Snipping Tool's interface. This will then transform your cursor into a crosshair, permitting you to select the specific area of the screen. Subsequently, click the "Start" option to commence the recording.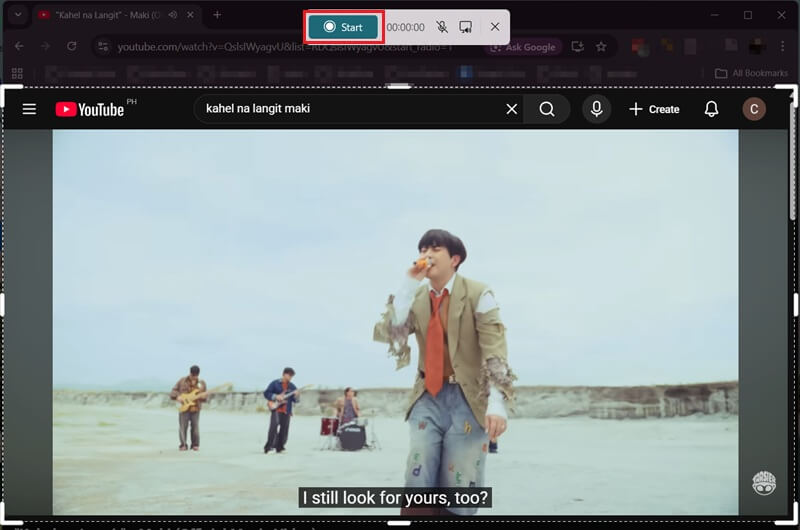
Step 3 Stop and Save Your Recording
When you have finished capturing your screen activity, hit the "Stop" button on the Snipping Tool's floating toolbar. Then, the recorded video will appear in a new Snipping Tool window. Here, you can review your recording before saving it to your desired location.
Recommended Third-Party Screen Recorder for Dell Laptop
If you want more features than the built-in tools offer, third-party screen recorders are a better choice. They give you more control over video quality, audio, and editing. Here are some of the most reliable screen recorders for Dell laptops.
1. Aqua Demo
For users seeking advanced functionalities beyond native Windows tools, Aqua Demo is a reliable option for recording on Dell laptops. It allows you to screen record on a Dell laptop in full-screen, a custom region, or a specific window, with smooth performance. You can also screen record on Windows 11 with audio, capturing both system sound and microphone at the same time. This is useful for tutorials and presentations. Besides, this screen recorder supports high-quality output and lets you alter the resolution, frame rate, and audio settings to suit your needs. It also includes a Task Scheduler, allowing you to set recordings at a specific time without manual start. This feature is helpful for capturing live events or scheduled meetings.
2. OBS Studio
For advanced users who need a powerful and flexible tool, OBS Studio is a great choice. It is a free and open-source screen capture tool that lets you record your screen and stream content. With OBS Studio, you can easily set up a Dell laptop screen capture by selecting different sources, such as full screen, window, or a custom area. It also gives you full control over audio, allowing you to record Discord audio alongside your microphone and system sounds. In addition, the software offers high-quality recording, scene switching, and detailed video and audio settings. However, it may take some time to learn, especially for beginners, but it is worth it for the control it provides.

3. Free Online Screen Recorder
If you do not want to install software, a free online screen recorder is a good option. It lets you start recording right away in your browser, making it fast and convenient. Because of this, many users prefer it for quick tasks and simple recordings. With this online screen recorder, you can easily do a Dell laptop screen capture by choosing to record a browser tab, a specific window, or your full screen. It also supports audio recording, so you can capture both your microphone and speaker sound. This makes it useful for recording Botim calls or other online conversations. Additionally, it does not require you to set up anything, and it's easy to use. Nevertheless, it may have fewer features compared to desktop software, especially for long recordings.

Record Dell Laptop with Aqua Demo
Recording your screen with Aqua Demo is simple and gives you more control compared to built-in tools. It works well for tutorials, meetings, and gameplay. You can pick what part of your screen to record and adjust settings based on your needs. Here are the steps you can follow to record your Dell laptop screen using Aqua Demo.
Step 1 Install the Screen Recorder
First, download the Aqua Demo installer by hitting the download button above this step guide. Afterward, run the installation file and go through the prompts to complete the software installation on your Dell laptop. Once installed, it will automatically launch to access its intuitive interface.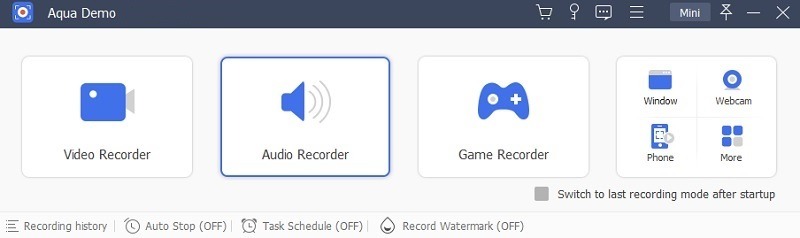
Step 2 Modify Output Settings
Before commencing recording, navigate to the "Settings." From the dropdown menu, click the "Output Settings" option. Here, you can set your desired output format, frame rate, and video quality to ensure optimal capture for your intended purpose. After that, click the "OK" button to keep the modifications.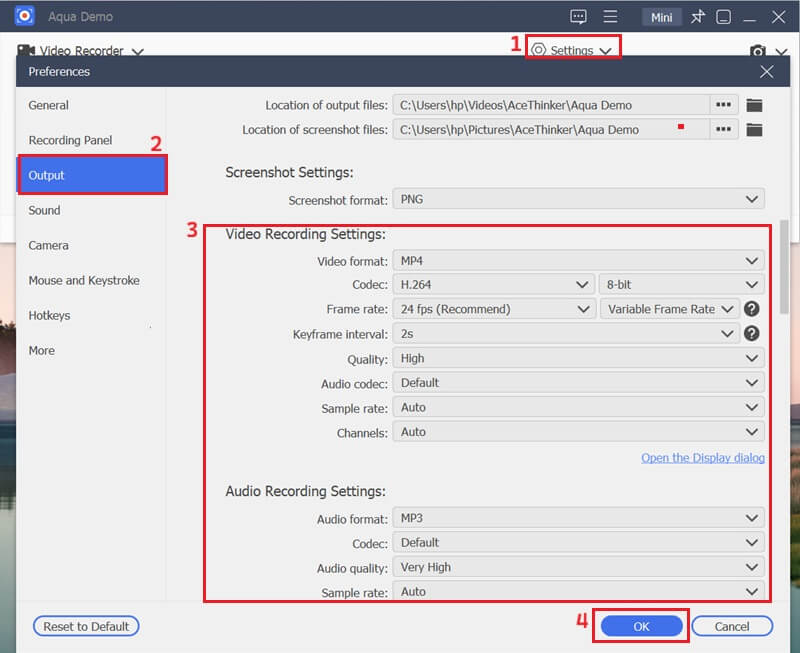
Step 3 Record Dell Screen
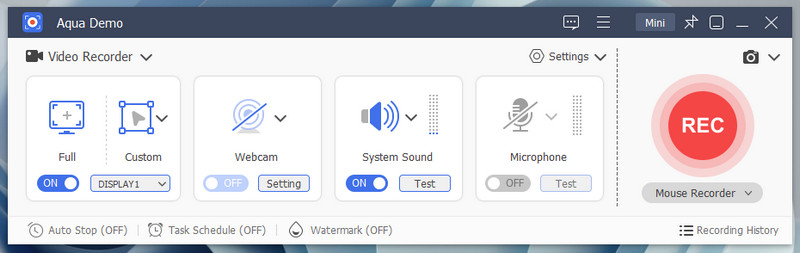
Access the application or content you wish to record on your Dell laptop. Then return to Aqua Demo, choose the "Custom" recording mode, and select the exact screen region you intend to capture. Subsequently, toggle the audio input to system sound, microphone, or both. Lastly, hit the "REC" option to initiate the recording process.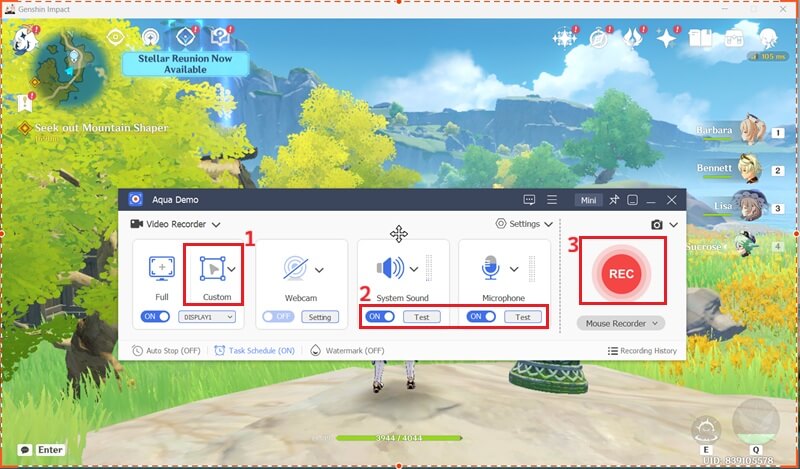
Step 4 Preview the Recording
When you're done capturing on your Dell laptop, click the "Stop" icon on the tool's floating toolbar. The recorded video will then automatically appear in a preview window. From here, you can click the "Play" option to review your output recording.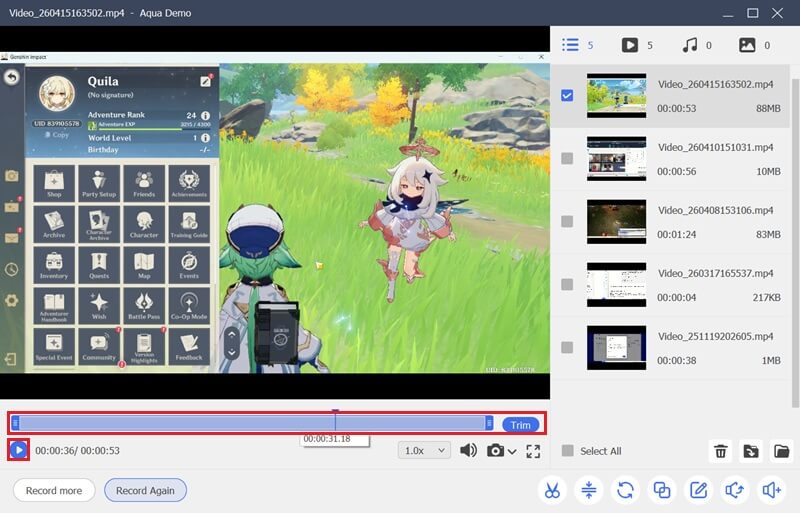
Conclusion
Screen recording on a Dell laptop is easy once you know the right tools to use. Built-in options like Xbox Game Bar and Snipping Tool are great for quick tasks, while third-party tools offer more control and better features. To screen record on Dell laptop, you just need to choose the method that fits your needs and skill level. If you want a simple recording, the built-in tools work well. For more advanced tasks, software like Aqua Demo or OBS is a better choice. Keep practicing and exploring these tools to create tutorials, presentations, or recordings with confidence.
| Tool | Best For | Pros | Cons |
|---|---|---|---|
| Xbox Game Bar | Quick recordings & gameplay | Built-in, easy to use, no install needed, supports audio | Limited features, cannot record desktop or file explorer |
| Snipping Tool | Short clips & simple recordings | Built-in (Windows 11), select specific area | Basic features, limited editing, not ideal for long recordings |
| Aqua Demo | Tutorials & professional use | High-quality recording, audio + mic support, task scheduler, annotation tools | Requires installation |
| OBS Studio | Advanced recording & streaming | Free, highly customizable, supports multiple sources and audio | Steep learning curve, complex setup for beginners |
| Free Screen Recorder Online | Quick browser-based recording | No installation, easy to use, supports screen + audio | Limited features, needs internet |