 Amazon Chime is a cloud-based communication tool used for online meetings, video calls, and chats. It is widely used by teams, businesses, and even students to stay in touch and collaborate from different locations. Because meetings often include important discussions, many users choose to record them. This helps with keeping records, reviewing key points, and sharing information with others who were not able to join. Moreover, recording meetings can support training, improve team communication, and ensure nothing important is missed. It gives users a simple way to go back and check details anytime. In this article, we will explain how to record Amazon Chime meeting sessions using built-in features. It also covers alternative tools you can use if you need more recording options.
Record Chime Meeting using Built-in Recording Feature
The built-in recording feature is one of the easiest ways to manage Amazon Chime meeting recording. Since the feature is already part of the platform, you do not need to set up anything complicated. This means you can quickly record video calls and save them for later. This is useful for teams that want to review discussions or keep records of important updates.
The built-in option also maintains high audio and video quality because it is designed for Chime. This integration makes after-meeting tasks easier because recordings are usually saved automatically in Amazon Chime or cloud storage. As a result, users can readily access and share them at any time. However, all participants will be notified once you start recording, which helps ensure transparency during the meeting.
Step 1 Log in to Amazon Chime
To initiate the process, open the Amazon Chime application or web client. After that, enter your login details to access your account. Once you sign in, you can easily join or manage your meetings.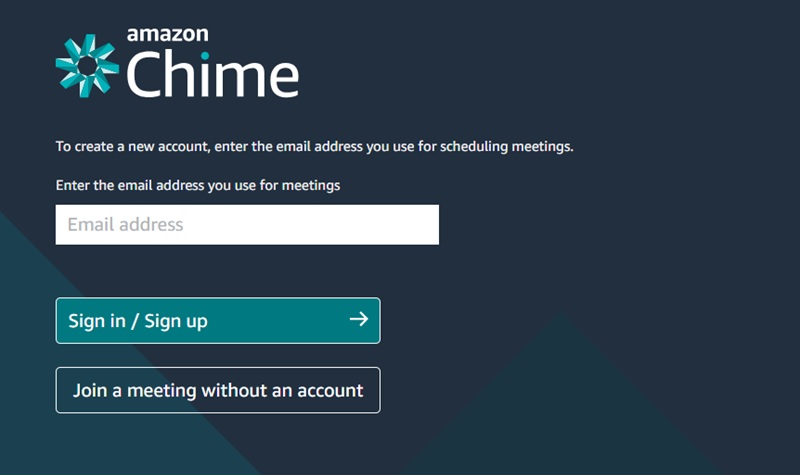
Step 2 Start or Join a Meeting
Once logged in, you can either start a new meeting as the host or join an existing session using the provided meeting ID. On the main interface, you will see the "Quick Actions" option, where you can choose to "Start an instant meeting" or "Join a meeting." Make sure your camera and microphone are properly configured before proceeding to ensure optimal audio-visual participation.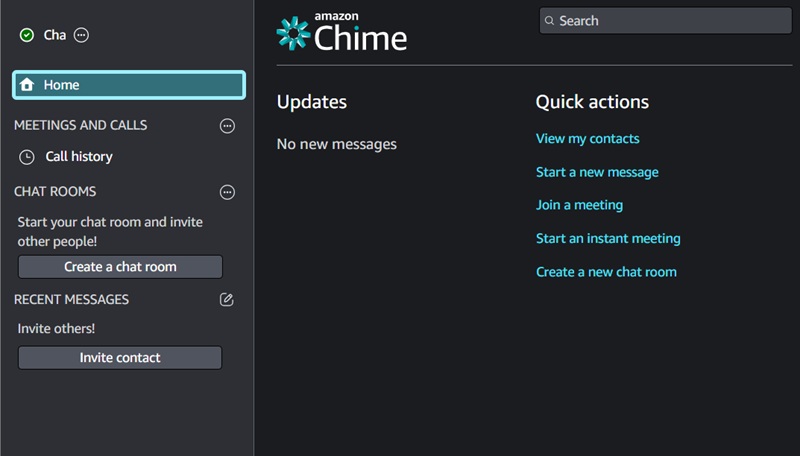
Step 3 Record the Chime Meeting
Upon commencing the meeting, locate the "More" option on the Chime interface. Then, click it on the dropdown menu to reveal additional controls. From here, select the "Record Meeting" option to initiate the recording process, ensuring all meeting interactions are captured.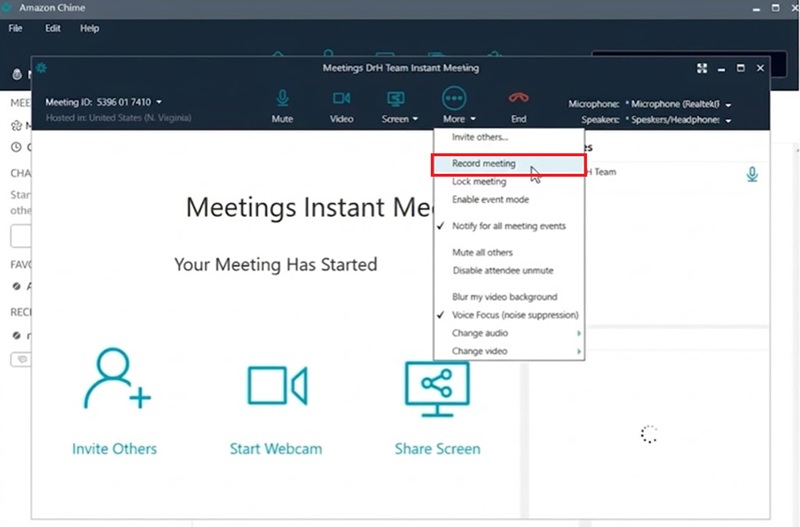
Step 4 Stop and Access Recording
Once your meeting has concluded, hit the "End" button to terminate the session. This will also automatically stop the recording. Then, the recorded file will be processed, and the recording will be available in "Amazon Chime Recording."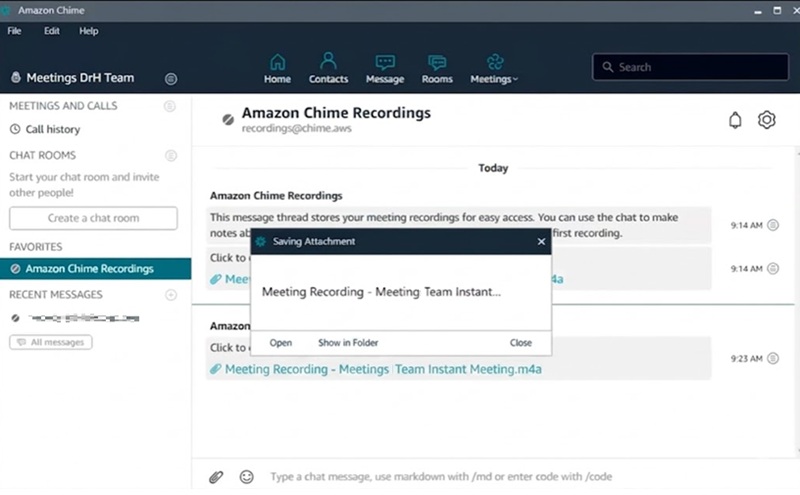
Capture Chime Session with a Reliable Screen Recorder
When you want a more advanced option for Amazon Chime record meeting, using a reliable screen recorder like Aqua Demo can be a good choice. Unlike built-in features, it gives you better control over how your recording looks and sounds. You can clearly record system sound and microphone at the same time, which helps capture both meeting audio and your voice.
In addition, you can turn on your camera or webcam to include your face during the session. Because of these features, many users also use it to record Google Meet and other online meetings. Another helpful feature is real-time annotation, which lets you add notes, draw, or highlight parts of the screen while recording. Here is a step-by-step guide to record Amazon Chime meetings using this tool.
Try it for Free
Step 1 Install Screen Recorder
First, download the Aqua Demo installer. You can do this by clicking any of the download buttons available above. Make sure to click the one that is compatible with your device. Then, it will automatically launch after the installation process.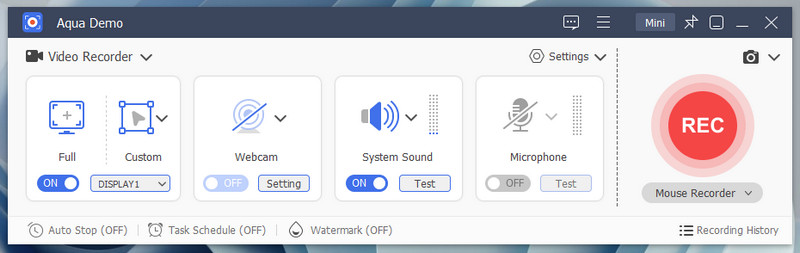
Step 2 Configure Recording Settings
Once launched, locate the "Settings" on the right part of the tool. Then click it to open the dropdown menu and choose "Output Settings." Here you can alter the output settings for your video recordings, including video format, resolution, frame rate, and audio codec. Make sure to hit the "OK" button to save the changes.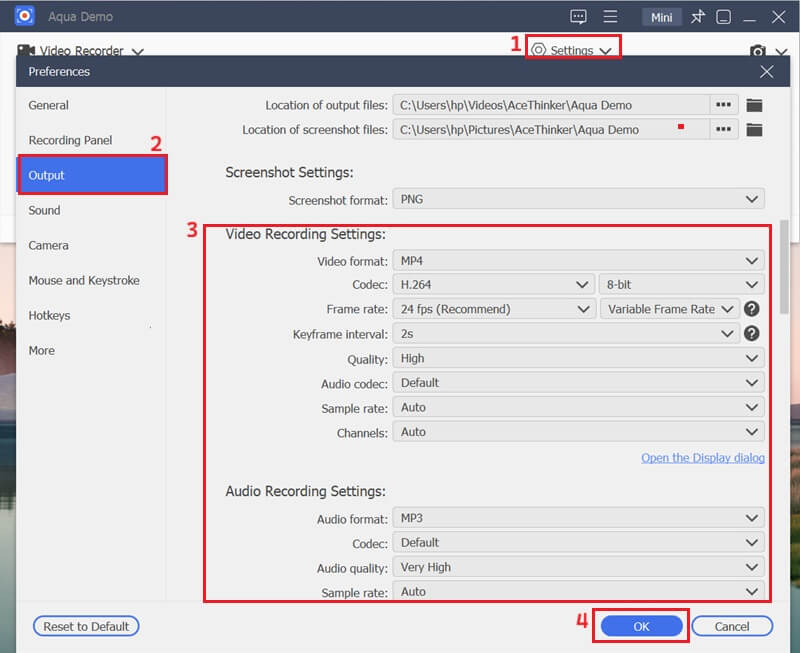
Step 3 Start Recording Chime Meeting
Return to the main interface of the screen recording tool and select "Video Recorder." Then, choose the “Custom” option to define the specific area of your screen where the Amazon Chime meeting is displayed. Subsequently, toggle on the system sound and microphone options to capture both meeting audio and your own voice. Then, smash the "REC" button to commence the Amazon Chime meeting recording.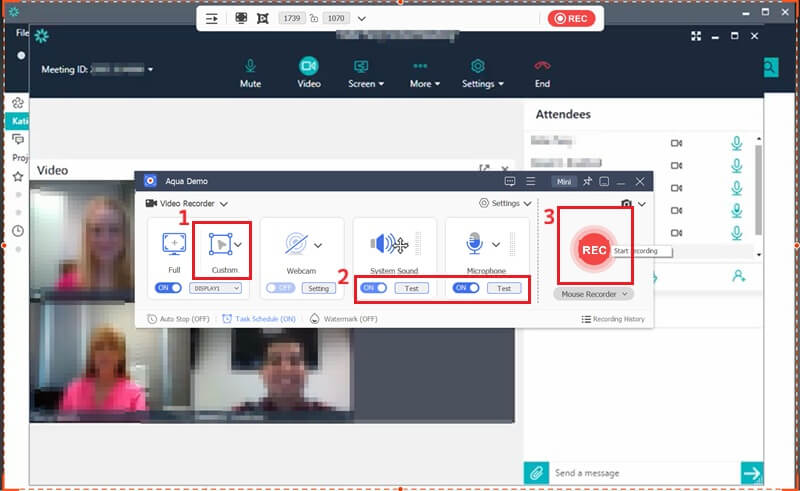
Step 4 Review Recordings
Once the Chime recording is finished, click the "Stop" button. After that, a preview window will appear where you can review your recorded Chime meeting. You can also trim it directly within the preview panel. This is how easy it is to record Amazon Chime meetings with this reliable recorder.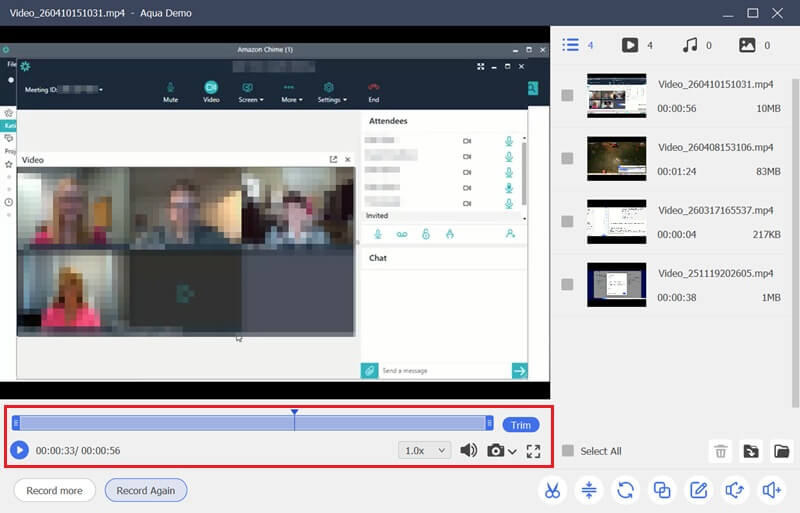
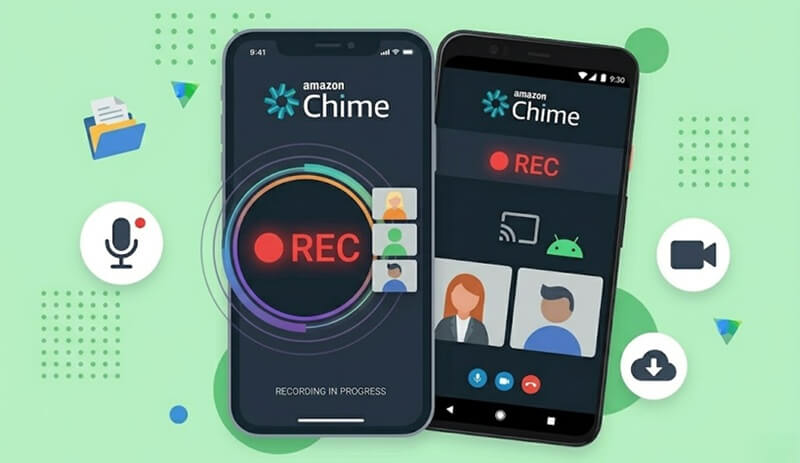
Record Amazon Chime Meetings on Mobile Devices
For users who often join meetings on the go, recording Amazon Chime sessions on a mobile device is very convenient. It also gives you greater flexibility to capture important discussions anytime, anywhere. However, built-in recording in Amazon Chime is usually available only for hosts or moderators. Because of this, many users rely on built-in screen recording features instead. For iOS devices, you can utilize the Screen Recording tool from the Control Center. Similarly, Android users can use the native screen recorder in the quick settings panel to capture Chime meetings directly on their mobile devices.
Recording on mobile devices is convenient, but it also has some limits. For example, some phones may not capture internal audio clearly, especially during calls. In some cases, only the microphone sound is recorded, which can affect overall quality. In addition, background noise and unstable connections may also reduce audio clarity. To get better results, try to record in a quiet place to avoid unwanted noise. Using earphones with a built-in microphone can also improve sound quality.
Frequently Asked Questions
Is it possible to download Amazon Chime recordings?
Yes, you can download your Amazon Chime recordings if you have the right access. Usually, recordings are stored in the Chime system or connected to cloud storage. From there, you can save a copy to your device for offline use. Just make sure you have permission to access and download the files.

Can I send my recorded meetings to others?
Yes, you can share your recordings with others when needed. You can send the file directly or share a link if it is stored in the cloud. This makes it easy for teammates or participants to review the meeting. Always check if sharing is allowed, especially for private or sensitive meetings.
Is there a storage limit for Chime meeting recording?
There may be limits depending on your storage plan or settings. Some accounts use cloud storage, which can have space restrictions. If you reach the limit, you may need to delete old recordings or upgrade your storage. It is a good idea to manage your files regularly to avoid running out of space.
Conclusion
There are different ways to record Amazon Chime meeting sessions depending on your needs and device. You can use the built-in recording feature for a simple, direct option with high-quality results. At the same time, third-party tools like screen recorders offer more control and extra features for better recordings. For mobile users, built-in screen recording can still be a helpful alternative. If possible, it is better to use Amazon Chime's built-in recorder for convenience. However, you can still try other tools to see what works best for you. By choosing the right method, you can record meetings more clearly and keep important details for later use.
| Tools | Effectiveness | Pros | Limitations |
|---|---|---|---|
| Amazon Chime | High – designed for Chime meetings with stable quality | High audio & video quality, automatic saving, secure, easy access | Only available to hosts/moderators, not flexible, not all plans |
| Aqua Demo | High – records screen, audio, and webcam clearly | Records system sound & mic, supports webcam, flexible recording area | Requires installation, may use more system resources |
| iOS/Android | Moderate – depends on device capability | Moderate – built into device | Limited audio capture, possible low quality, background noise issues |